The initiation into the 2nd Templar degree is possibly the most important Templar initiation of all. Although already a member of the Order, you are formally declared a Knight of the Temple or a Daughter of Tsion during this initiation. You will undergo the Vigil of Arms, perform the Holy Watch as well as endure the first of the Templar Trials. You are supposed to fast before the initiation for at least twelve hours, so keep that in mind when you plan your time to perform it. Below are things you should do in advance to prepare.
1. Be sure to practice the sword moves and sword stances from your R+C Study Hall lessons.
2. Have your white initiation cord ready. You will wear it during the initiation and replace it with a new initiation cord.
3. New initiation cord: this one is black and red. And famous!
The Templar Cord from Mysteries of the Templars
https://www.bibliotecapleyades.net/sociopolitica/sociopol_masonsknightstemplar08.htm
“In the Inquisition evidence there are several references to members of the order receiving on initiation a little cord that had been in contact with the ‘head’.” – Ian Wilson, The Shroud of Turin – The Burial Cloth of Jesus Christ?
Upon being initiated into the Order of the Peacock Angel (Yezidis),”a holy thread, of intertwined black and red wool, is put around the neck. Like the sacred thread of the Parsis and other ancient Middle Eastern cults, this must never be removed; and it sounds like the cord that the Templars were accused of wearing when the Order was suppressed as heretic.” – Arkon Daraul, Secret Societies
Most Templars interrogated during the heretical inquisition were 2nd degree Templars wearing black and red cords. Those caught had not been initiated into the higher degrees. There were around 200 tortured into confessing and of those the red and black cord was found on them. Jacques DeMolay and his right hand man would’ve had a full set of cords, but probably passed them off as prayer ropes or made sure they were not wearing them when arrested. Remember they anticipated arrest.
You will need to make yet another initiation cord and this time using black and red yarn. You will use this cord in all future operations just as you wear your white cord now during Templar workings. Try to use pure wool yarn (Wal-Mart has it, so no excuse!) because this cord was known to be made of wool. But some folks find wool too itchy or they just don’t like it, so don’t be afraid to use other yarn. The red and black cord you are about to make is extra special because you wear it for such a long time. It’s best if you make it yourself, but it is a complicated braiding method. Here are instructions if you want to do it yourself. If you have trouble doing braiding or working with yarn, let us know and we will gladly make you one. Email us with how tall you are and how much you weigh and your mailing address where you want the cord sent.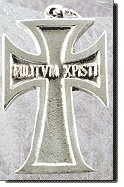
The Templar cross pendant pictured right is not a requirement. We just show it here to inspire you. Many Templars wore such a cross. Mouse over the picture to see what the inscription means. [We used to know a website where you could order one for $50. If anyone finds this Militum Christi cross pendant for sale, let Bishop Katia know, please.]
4. Gather the ingredients needed for a short eucharist — a bread wafer and a little bit of wine or grape juice.
5. HAIR CUTTING: In days of old the Knight-to-be would cut his hair short and offer the hair on the altar during the initiation. Sacrificing your hair was a sign of serious devotion to God’s holy work. Some long-haired knights would only cut off a lock, and of course women would not be required to cut off all of their hair. However,SOME offering of hair is required, even to this day. You will need to cut a small lock. Pick an inconspicuous spot and have it in mind for the day of the initiation. Women (and men with long hair): you can braid a tiny bit of your hair (one lock) and tie it off at the top and at the bottom, then cut it up as high as you are willing to go on the day of the initiation. You can have someone help you with this part, so don’t be shy about asking a friend or family member. If you are bald,you’d best be ready to draw some blood for your offering then. <grin> Just kidding. If you are bald, as a few of our members are, when it says in the initiation to cut your hair, you instead apply some olive oil at the base of your skull in the back (top of the neck), behind each ear, then bow your head, and wipe it off with a cloth or kleenex. Keep the cloth to use for your offering. For the initiation you’ll want a pair of scissors handy, and maybe some string to tie your hair into a lock. Or else you can put it in a plastic baggie– whatever works!
6. WEAPONS. This is the Vigil of Arms initiation; a very famous rite of knighthood. It has strict rules and procedures. Since it is “of arms” this means weapons. If you have replicas of any of the traditional weapons of knighthood have them cleaned of any dust and rust and have them ready for display on or at the foot of your altar during the initiation. If you don’t have actual weapons you should create a set of index cards with the name of a weapon and picture of one on each card. There are only five or six weapons, so you can make these cards easily and without much trouble using index cards. One option is to print the pictures on this page, cut them out and glue them onto the back of the index card and write the name of the weapon on the front. Non-combatants, you will also use weapons but not by swinging them. The weapons do not belong to you, but to a combatant. Your initiation will consist of you blessing the weapons as though doing so fora real combatant knight. If you have replicas you may use them, if not, make a set of cards as described. Combatants you will array your weapons on the altar for your priestess partner (Daughter or Cleric of Tsion)to come and bless/charge during your Vigil. You will be told how to do this in the initiation, just have your weapons — be they actual replicas,the real thing(!) or symbolic cards — ready. Partners who are getting initiated at the same time can share the same set of weapons. The non-com blesses them, the combatant lays them out and is the one who will use them. If your partner was already initiated into the 2nd degree and you area combatant, ask him/her to bless your weapons for you. If you area non-combatant, ask your partner for his/her weapons. You will re-consecrate, charge and bless them during your initiation. Most of you work without a partner, or with an “invisible” spiritual partner. That is fine, of course. You should meditate or try to visualize him/her and tell them what’s going on, ask them to come to your initiation and either bring their weapons for you to charge and bless (if you are a non-com)or to come and consecrate them (if you are a combatant).
Here is the list of weapons: sword, lance, rounded kite-shaped shield, mace (spike-ball fastened or chained to a stick), dagger, spear,
A Templar’s main weapon was a large straight double sided sword (a completely different design to the Turkish blade which was a slightly curved, flexible scimitar). His secondary weapon was a Turkish mace, principally a stick with a heavy spiked ball on the end. He also carried a long dagger about his belt and also two smaller knives. — http://www.angelfire.com/mt/frerehelmut/structure.html
Note: bows and cross-bows were considered “un-christian,” cowardly and dishonorable because you didn’t look your opponent in the eye as you killed him. The Church asked Templars not to use them, though women and non-Templar archery units were allowed. Wonder what they’d think of car bombers and cowardly terrorists who hide behind masks and women’s skirts.
7. ROBES
If you want to do a perfectly authentic initiation you may acquire or make the following initiatory garments. You can improvise or if worse comes to worse, close your eyes and imagine these garments being put on you when the time comes for them in the initiation. Use a white, red and then black card or pieces of cloth if you cannot get any of these garments. Then during the initiation you can lay down your white card/cloth,then cover it with a red card/cloth, finished with a black card/cloth. Another possibility is armbands. Tie a ribbon or piece of cloth of the appropriate color around your upper arm when it comes time for that particular robing part of the initiation, then cover it up with the next color (red) followed by black at the 3rd robing during the initiation (all explained during the actual ritual).
a. Long white tunic (or use whatever white garment you used for your baptism ritual). Women have used a slip or nightgown for this one, men a long T-shirt or bathrobe
b. Red garment with long sleeves and a hood(I have known initiates to use a red hooded sweat-shirt for this one, do what you can).
c. Close-fitting black coat of any kind.Long coats with buttons were used during the days of chivalry and knighthood. The coat would be put on over the above two robes and buttoned up all the way to symbolize that a knight should never fear death, it will come to him only when it is time. You can use a black trench coat, even black bathrobe or ceremonial robe if you have one on hand.
8. SPURS. You will earn your spurs during this initiation. If you happen to have any spurs in your possession or which you can borrow, have them ready on your altar. Otherwise have a metal coin, preferably a gold coin if you can manage it, on your altar. We found some cool key chains in Texas that are little metal spurs. Very cool looking, but they are silver (Squires wore silver spurs,Knights wore gold). You might find something online for purchase, and one member found a gold spur charm, tiny yes, but gold and a spur, so it was perfect for the initiation.
9. Bed. Yes indeed you will need your very own bed for this initiation! At one point during the initiation you will lie down on your bed for several minutes to symbolize a kind of death. So you might want to have your bed all made up nicely. Also,your altar, if you can, should not be in your bedroom. However, if you have no other option, that’s okay.
 10. Your Opinion
State your opinion or position on the following two related issues:
a. The Arab-Israeli conflict. What is your opinion on Israel and the Palestinians fighting over small but potent areas of land? Do you see any factors at play such as greed, money-lust, blood-lust or violence for offense (as opposed to defense)? Is either party to this conflict misguided? If you say both are, which one (if any) is more misguided. This is important since our name “Knights of the Temple” refers to the literal Temple Mount.
b. Is Jerusalem a holy city of Islam or of Judeo-Christianity? If you say both, be sure to research just when and why the Muslims began to call Jerusalem their 3rd holiest site.
11. Read this informative Article on the Vigil of Arms
12. Quaternity Chart
You need to either print or draw the following Quaternity Chart. If you have to draw it, just do the square, with circle inside it and then red X (be sure to use Red for that part!)inside that. Then label each of the quadrants with as many words as you can fit in your drawing, but you must put Spirit, Body, Mind and Soul. I recommend at least putting the deity name that goes in each quadrant,too. Magdala in Soul, Father-God in Spirit, Yeshua in Mind, Mother-God in Body.
When you have all of the above supplies gathered and a date chosen for your initiation,email the Prioress, Lady/Bishop Katia and let her know. Then she will send you the initiation script. Put KT 2nd Deg. Init. Prep Complete in the subject line. Don’t forget, you are asked to fast for at least 12 hours before the initiation so figure that into your schedule, too.

Here is a slightly canted version which you will need during the initiation(red plus sign becomes red X).

Copyright 2004 Katia Romanoff, Esoteric Interfaith Church, Inc.
4-Strand Braiding and Plaiting Instructions Back to Top
Four-strand braid: This lies flat. Having secured the ends, divide the four cords into a left-hand and a right-hand pair. Simultaneously, cross the outer one of the left-hand pair over its partner, and cross the inner one of the right-hand pair over its partner – so it’s right over left in both cases.Now cross the inner right over the inner left. Repeat these two steps.
Four-strand plait: This is the way the old-fashioned telephone wires were plaited. Having secured the ends, divide the four cords into a left-hand and a right-hand pair. Take the outer one of the right-hand pair behind its partner, and behind the first of the left-hand pair. Then up through the middle, and back over the inner of the left-hand pair, to lie beneath the other right-hand cord. Similarly, take the outer one of the left-hand pair behind its partner, and behind the first of the right-hand pair. Then up through the middle, and back over the inner of the right-hand pair, to lie beneath the other left-hand cord. Repeat these two steps.